Ultimate Guide to Podcast Equipment and Microphones: Everything You Need to Know

When it comes to podcasting, choosing the right gear will enhance your sound and simplify the whole recording process. Whether you need a dependable microphone, a sturdy mixer, or comfortable headphones, understanding what each piece of equipment does will help you make the right decision.
This ultimate guide covers everything you need to know about podcast equipment, from beginner-friendly setups to advanced gear for professionals. We’ll explore microphones for every budget, step-by-step instructions for setting up your equipment, tips to extend your gear’s lifespan, and more. But first, let’s dive into why quality equipment is essential for podcasting success.
Why Quality Podcast Equipment Matters
Using the right equipment creates a better listening experience by delivering crisp audio that keeps your audience engaged from start to finish. Quality gear helps reduce background noise, cuts down on editing time, and gives your show a professional feel that builds trust with listeners. It also makes guest interviews easier to manage, whether you're recording in person or remotely. And if you're thinking about monetizing, sponsors and advertisers are more likely to take interest in a podcast that sounds refined.
On top of that, when you sound good, you're likely to feel more confident and comfortable behind the mic. And as your podcast grows, you can expand your gear as needed.
Investing in quality podcast gear that’s right for you improves not just how you sound, but also how you perform and connect with your audience.
The Role of Microphones in Podcasting Success
Clear audio helps make you sound more confident and professional, even if you’re just starting out. So, naturally, microphones are high on the importance scale when it comes to making a successful podcast. You don’t have to spend thousands on new mics, but it should be an investment in your future.
Next up, we’ll cover the basics of various podcast equipment, looking at different types of microphones and more.
Essential Podcast Equipment for Beginners
Podcast equipment includes AV technology like microphones, audio interfaces, mixers, and headphones, as well as accessories like pop filters and boom arms. To pick the right podcast gear, consider what you want to achieve, where you'll be recording, and how much money you're willing to spend.
Microphones: Dynamic vs. Condenser
The two most popular types of microphones are dynamic and condenser. While they’re both widely used, they have some aspects that set them apart. The main differences between them come down to how they pick up sound and where they work best.
Dynamic microphones are tough and don’t pick up much background noise, which makes them ideal for podcasting at home or in untreated environments that aren’t soundproof. They’re simple to use and don’t require any extra power.
Condenser microphones, on the other hand, are more sensitive and capture more detail in your voice, which is great for studio settings. But considering that they pick up more sound, they’re more likely to catch background noise if your room isn’t quiet or properly treated, so that’s something to keep in mind. They also require a good bit of power (known as phantom power) to work.
Looking for a more thorough description of several different types of microphones? Check out Types of Microphones: Choosing the Right Microphone for Every Use
Read HereAudio Interfaces and Mixers
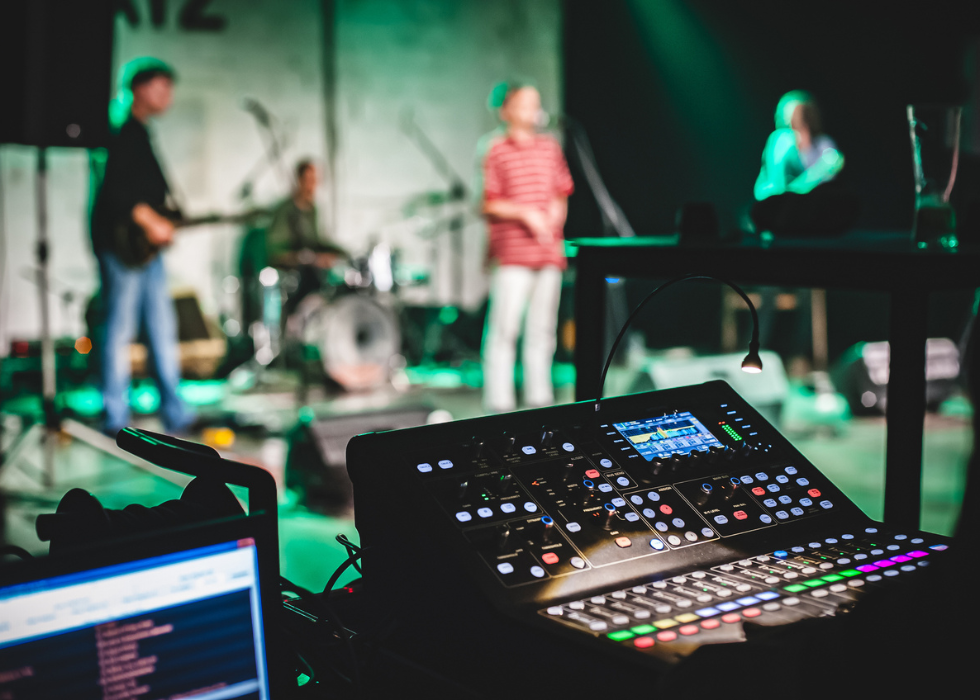
Audio interfaces and mixers are essential tools for podcasters aiming to achieve good-quality sound. An audio interface converts your microphone's analog signal into a digital format that your computer can process, ensuring clear and accurate audio capture. A mixer allows you to manage multiple audio sources, adjust levels, and apply effects in real-time, offering greater control over your podcast's sound.
For beginners seeking budget-friendly options, several brands offer reliable products that balance quality and affordability. Popular choices for audio interfaces include the Behringer UMC22 or the ZOOM U-44. When it comes to mixers, popular choices include the Mackie Mix8 and the Behringer Xenyx Q502USB. Although a bit pricier, the Zoom PodTrak P4 is also a common choice for podcasters.
Headphones for Monitoring
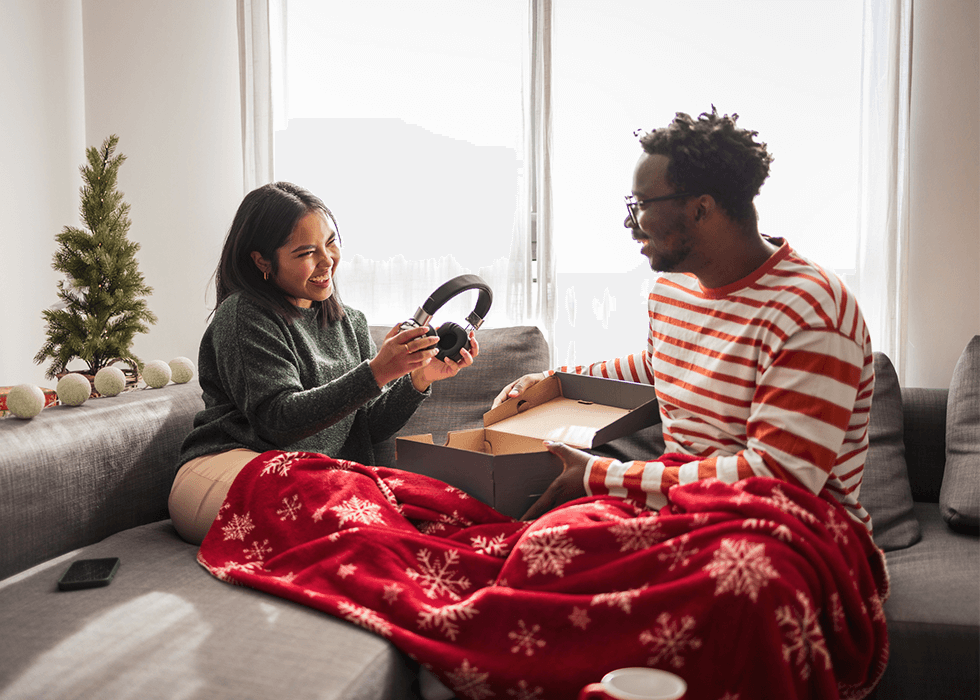
Choosing the right pair of headphones is crucial for monitoring your audio during recording and editing. High-quality headphones help you catch issues like background noise or distortion. Popular choices include the Sennheiser HD 280 Pro and the Sony MDR7506. If you’re looking for long battery life, explore options like the Audio-Technica ATH-M50xBT2.
Pop Filters and Boom Arms
Accessories such as pop filters and boom arms can help take your podcast’s professionalism to the next level.
A pop filter is a screen placed between your mouth and the microphone to reduce plosive sounds—like the harsh "p" and "b" noises—that can cause distortion in your recordings. By diffusing the airflow, pop filters help maintain clean and clear audio, making your podcast more pleasant for listeners. Two popular choices include: Nady MPF-6 and Stedman Proscreen XL.
Additionally, a boom arm is a flexible stand that holds your microphone in place, allowing you to position it comfortably. It also helps reduce unwanted noise from bumps, keyboard clicks or handling the mic. If you’re planning to record indoors or in one stagnant location, a boom arm would be especially helpful. Popular choices include: Aokeo AK-48 and Neewer NW-35.
Advanced Podcast Equipment for Professionals
In this section, we’ll explore advanced podcast equipment, including high-end mics and multi-channel mixers and recorders. We’ll also touch on acoustic treatment—the process of adding soft materials like foam panels, rugs, or curtains to a room to help reduce echo and background noise for clearer sound.
High-End Podcast Microphones
High-end podcast microphones are professional-grade mics designed to deliver studio-quality audio with minimal noise, rich vocal tone, and excellent clarity. They’re often used in broadcasting and professional studios. Most are XLR mics, which means that they require an audio interface or mixer. A high-end mic is a smart investment if your podcast is growing and you want to improve production value, you're recording regularly or professionally, or you want to reduce editing time. One of the most popular choices is the Shure SM7B, a legendary dynamic mic known as the gold standard for podcasting and broadcasting.
Multi-Channel Mixers and Recorders
Multi-channel mixers and recorders are audio devices that capture and manipulate multiple sound sources at the same time, enabling detailed control over individual audio elements. The result is a balanced, refined final product. Mixers blend and control audio signals routing them to different outputs, while multi-track recorders capture each sound on a separate channel. Together, they enable you to record individual instruments and vocals for later mixing, record high-quality dialogue, or create immersive multichannel audio.
Acoustic Treatment for Your Recording Space
Acoustic treatment is a crucial but often overlooked part of podcast production. It ensures clearer recordings, eliminates the need for post-processing, and can make a big difference—for relatively little money.
Excess reverb (echo) in recordings typically comes from untreated rooms, and once those sound reflections are recorded, they’re hard to fix in editing. So, treating a room before recording is ideal. To start, identify “first reflection points” (walls, ceiling, and floor surfaces around your mic) and focus treatment on those areas. Key methods include absorption (using rugs, panels, curtains) and diffusion (using irregular surfaces/furniture) to break up sound reflections. For more budget-friendly setups, you can DIY acoustic panels or use soft furnishings.
Be sure to treat first reflection points, use soft furnishings, and seal any drafts coming in from doors or windows. Also, make sure your mic is placed away from walls and windows, so it faces toward the treated portion of your recording space.
Related: Create a More Acoustically Pleasant Home Office Environment
Choosing the Right Podcast Microphone
To help you choose the right podcast microphone, we’ll dive into the pros and cons of dynamic and condenser mics. We’ll also cover the differences between USB and XLR microphones.
Dynamic Microphones: Pros and Cons
Dynamic microphones are a popular choice for podcasting, especially for beginners and intermediate users. So, let’s get into the pros and cons of dynamic mics.
Pros: Dynamic mics are less sensitive to background noise, room reverb, and ambient sounds, making them ideal for home studios or noisy environments. They don’t require external power, which simplifies setup and makes them more compatible with a wider range of audio interfaces and portable recorders. They’re also durable, reliable, and often more affordable than high-end condenser models. Many of them produce a warm, natural tone that suits spoken words, which makes them a favorite among podcasters.
Cons: Despite their strengths, dynamic microphones have some drawbacks. They require more gain to produce a strong signal, which can expose noise if your audio interface or preamp isn’t up to par. This often leads you to invest in a mic activator, adding to the overall cost and complexity. These mics also capture less vocal detail than condenser mics, so the sound may lack high-end clarity or polish. Additionally, most dynamic mics are cardioid, meaning you need to speak directly into them. Some models tend to be bulky, requiring a sturdier stand or boom arm.
Condenser Microphones: Pros and Cons
Condenser microphones are known for their clarity and sensitivity, making them a popular choice for experienced podcasters who want a crisp, detailed sound. Let’s get into their pros and cons.
Pros: Condenser microphones are highly sensitive and offer excellent clarity, making them ideal for capturing the full detail and nuance of the human voice. They deliver a bright, polished sound with a wide frequency response and dynamic range, which helps bring out vocal depth and presence. This makes them an optimal choice for professional studios or controlled environments. Many USB condenser mics are also beginner-friendly and easy to use with a computer, offering plug-and-play convenience.
Cons: Due to their sensitivity, condenser mics pick up background noise, room echo, and other unwanted sounds, making them less suited for untreated or noisy spaces. Additionally, they require phantom power from an audio interface or mixer, adding complexity to the setup. They're fragile and can be more expensive than dynamic mics, especially when factoring in the cost of proper gear and room treatment for best results.
USB vs. XLR Microphones: Which is Better?
Dynamic and condenser microphones can come in either USB or XLR formats (and sometimes both). But which option is more convenient and better suited to your needs?
A USB microphone connects directly to your computer via a USB cable. It has a built-in analog-to-digital converter, so you don’t need an audio interface or mixer. USB mics are plug-and-play, easy to set up, and often come with built-in headphone jacks for real-time monitoring. They're ideal for solo podcasters, beginners, and those who want a simple, all-in-one solution.
An XLR microphone uses a three-pin connector and must be plugged into an audio interface, mixer, or recorder that provides phantom power (for condenser mics) and handles the analog-to-digital conversion. XLR setups are the industry standard for professional audio, offering higher audio quality, flexibility, and better control over sound.
So, which is better?
That depends on a few things. If you're just starting out, working solo, or want a simple, affordable setup, USB microphones are a great choice. They’re easy to use, portable, and good enough for most beginner-to-intermediate podcasts. However, if you’re planning to record multiple people or want higher audio quality, XLR is the better investment.
Mics that offer both USB and XLR connections give you the best of both worlds, so consider hybrid models as well.
Top Podcast Microphones for Every Budget
From budget-friendly to pro-level, there’s a mic option for every podcaster. You can find perfectly decent microphones, headphones, and other equipment for a few hundred bucks before stepping up to more premium gear. Let’s take a look at the best microphones for beginners, growing podcasters, and professionals.
Best Budget Microphones for Beginners
Some budget-friendly options for those just starting out their journey in podcasting include the Rode Podmic, Shure SM58, Audio-Technica AT2020USB+, and Samson Q2U. These microphones offer good quality without breaking the bank, typically priced at a little over $100. Blue Yeti is also a brand that supplies great choices for beginners and beyond.
Mid-Range Microphones for Growing Podcasters
Midrange picks include microphones like the Shure MV7, AudioTechnica AT2020, Electro-Voice RE320, PreSonus PX-1, Sennheiser Profile, and more, which offer cleaner tone and extra features. These mics tend to fall closer to the $200 range.
Premium Microphones for Professional Studios
Premium mics named frequently are the Shure SM7B, Heil PR40, Electro-Voice RE20, Rode NT1 5th Gen, and more. These are often used by pros and broadcast. They typically are set at around $200 or more.
Setting Up Your Podcast Equipment
Once you’ve purchased your equipment, you’ll want to set it up. In this portion, you’ll learn how to position your mic, how to connect your mic to an audio interface, and how to reduce background noise in your recordings.
How to Position Your Microphone for Best Sound
When it comes to setting up your podcast equipment, positioning is everything. Positioning your mic properly depends on factors like what kind of mic you have and the treatment of your space. In general, your microphone should be about 6-8 inches away and at a 45-degree angle from your mouth. The best way to know if you’ve hit a sweet spot is to record some test audio!
Connecting Your Microphone to Your Audio Interface
To connect your microphone to an audio interface, plug one end of an XLR cable into your mic and the other into the interface's input. If you're using a condenser mic, turn on the interface’s phantom power (+48V). Then, connect the interface to your computer via USB, open your recording software, and select the interface as your audio input. Adjust the gain knob on the interface so your voice is clear without distortion. For the best experience, use headphones plugged into the interface to monitor your sound in real time while recording.
Tips for Reducing Background Noise
If you know you’ll be filming in a noisy location, you can try getting closer to the mic, about 4 inches away, so you can lower the gain and capture less ambient sound. You can use blankets, rugs, or clothes to help absorb echo too.
Additionally, keep other electronics away from your mic to avoid interference and use a pop filter to reduce breath and mouth noise. Always monitor with closed-back headphones so you can catch issues early and stay still during recording to avoid unwanted bumps or vibrations. A boom arm can help reduce noise as well.
Maintenance and Care for Podcast Equipment
Maintaining your equipment is imperative as it protects your investment, ensures consistent audio quality, and keeps your production workflow smooth. Whether you're a beginner or a seasoned podcaster, taking care of your gear not only helps you avoid technical issues but also costly repairs. If you want to extend the lifespan of your gear, proper cleaning and storage are essential.
Cleaning and Storing Your Microphones
Cleaning and storing your microphones correctly are necessary to maintain sound quality, longevity, and hygiene. Watch the video below to see how to clean your microphones—whether they’re dynamic or condenser mics.
When it comes to storage, unplug your mic when it’s not in use and store it in its original case or a padded bag to protect it from dust, moisture, and impact. You can also cover it with a dust cover or plastic bag if it stays mounted on a stand. Dust is the silent killer of electronics, so make sure to keep your mic protected from it! Also, try to keep the mic in a dry, climate-controlled space. For cables, loosely coil them and avoid tight bends or wraps to prevent cable damage and interference issues.
Extending the Lifespan of Your Audio Gear
Extending the lifespan of your audio gear is all about consistent care, smart usage, and proper storage. Well-maintained gear can serve you for many years, saving you money and helping ensure your podcast sounds great every time. One of the most important things you can do is to keep all your equipment protected from dust.
If your gear breaks or you no longer need it, consider recycling or donating it. Your best resource to find out how and where to recycle your gear is on the E-cycling Central page presented by the Telecommunications Industry Association (TIA). You can also give your AV equipment a second life by donating it through a network that SAVe has established with educational institutions and non-government organizations.
Frequently Asked Questions About Podcast Equipment and Microphones
Q: What’s the Best Microphone for Podcasting?
A: Choosing the “best” microphone depends on factors like your budget and setup. Are you planning on including guest speakers? Will you be recording in multiple locations or just one? Indoors or outdoors? Brands like Shure, Audio-Technica, and Blue Yeti offer popular microphones, but you should make a checklist of your needs before making any decisions. Consider the pros and cons of condenser and dynamic mics as well as others.
Q: Do I Need an Audio Interface for Podcasting?
A: Whether you need an audio interface mainly depends on the type of microphone you're using, your setup goals, and how much control you want in your audio. If you’re planning on including guests or live music, it’s highly recommended. While you don't necessarily need an interface for a USB mic, you’ll need one for an XLR mic. Just keep in mind that it’s much easier to get high quality recordings from an audio interface.
Q: How Much Should I Spend on Podcast Equipment?
A: In total, podcast equipment can come out to a few hundred or a few thousand dollars. The good thing is you can get started pretty cheaply with just a few pieces of gear and then invest more along the way as you see fit. You can find decent microphones, headphones, and interfaces for a few hundred bucks before stepping up to more premium equipment and additions. For acoustic treatment, you can spend $0 using items like blankets and rugs you already own or up to a few hundred for real panels.
Podcast Equipment: The Takeaway
At the end of the day, choosing the right podcast equipment comes down to understanding your goals, environment, and budget. Luckily, you don’t need to break the bank to get started since a well-chosen mic and a quiet space can produce great results for beginners. As your podcast grows, you can gradually upgrade your gear.
When selecting equipment, it's important to focus on what really matters for your show. Are you recording on your own or with guests? Is your location quiet or do you need to filter out background noise? These are all important considerations.
Finally, whether you’re just starting with a simple mic or investing in a pro-level studio, the most important thing is getting started and staying consistent. Create with what you can, grow as you go, and build a setup that supports your vision.
- Share to Facebook
-
Share to X/Twitter

- Share to LinkedIn
- Share with Email